Custom mouse cursor in CopperCube 6
In this tutorial we will be creating a custom mouse cursor. We'll be using CopperCube 6 for this.
Target platform: Windows (.exe)
Tutorial difficulty: ![]()
![]() two cubes out of ten (2/10)
two cubes out of ten (2/10)
Time needed: ~15 min.
Getting Started[edit | edit source]
First, we will need a texture/image to be used as a mouse cursor. It should have transparent pixels (alpha channel) set to it. This will make our cursor more usable. So, the image should have an arrow pointing to the top-left corner of the image area. The arrow should be visible, preferably with a border or outline. The rest area of the image should be transparent, or semi-transparent.
You can use this image for the sake of this tutorial:
![]() mycursor.png (32 x 32 px)
mycursor.png (32 x 32 px)
2-D Coordinate Space[edit | edit source]
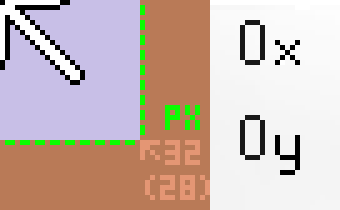
Here we will encounter a slightly different coordinate space in which Y direction goes down in space. So the top-left corner is 0x and 0y. The further you go to the bottom and to the right the more coordinates increase.
      +----> (x)
      |
      |
      \/
       (y)
JavaScript Code[edit | edit source]
We will make the cursor appear on screen using the
ccbDrawTextureRectangleWithAlpha
method. Note the last two words that say WithAlpha. This means that the function is using alpha or transparent pixels, which is what we need.
So, for the cursor to be drawn (to appear) on our game screen, use a code like this:
function onFrameDrawing()
{
   var mX = ccbGetMousePosX();
   var mY = ccbGetMousePosY();

  ccbDrawTextureRectangleWithAlpha("mycursor.png", mX-4, mY-4, mX+28, mY+28);

  ccbSetCursorVisible(false);
}

ccbRegisterOnFrameEvent(onFrameDrawing);
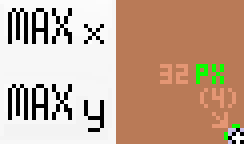
First, we define a function that will be called every frame. Inside that function we get X and Y positions of our mouse and store those into variables mX and mY respectively. We create a ccbDrawTextureRectangleWithAlpha function call and specify 5 parameters to be used by that function. First one is "mycursor.png" and it tells which file will be used for drawing a cursor image. The next 4 parameters are: x beginning position, y beginning position, x ending position, y ending position (all in pixels). We apply some math so that the cursor functions accurately. This image below shows which pixel will correspond to the actual position of user's/player's mouse.
By subtracting 4 pixels in x and 4 pixels in y we set the wanted active pixel to 4x4y on the cursor image.
By adding 28 pixels to the x ending position and 28 pixels to the y ending position we set the width and height of the cursor. Which is 32 pixels wide and 32 pixels tall. This is because 32-4=28. And because we subtracted 4 pixels from the beginning, the whole image needs to shift by 4 pixels.
 So now, if you were to position your mouse at the top-left corner of the game screen, the active pixel should be in the right place (0x0). And if you were to position you cursor at the bottom-right corner of the screen it would be in the right place (max x max).
![]() The file used: mycursor.png (32 x 32 px)
The file used: mycursor.png (32 x 32 px)
Now we add
ccbSetCursorVisible(false);
so that the regular system cursor is hidden.
Lastly, by adding this line
ccbRegisterOnFrameEvent(onFrameDrawing);
we call ccbRegisterOnFrameEvent method to make our function 'onFrameDrawing' to be drawn on every frame. You can read more about ccbRegisterOnFrameEvent in the documentation of CopperCube 6 by going to 'CopperCube' > 'Help' > 'Open documentation in browser...'. See JavaScript Scripting reference page.
Alright, now we should be fine with the code, let's move on and see how to actually apply it.
Adding cursor[edit | edit source]
Save mycursor.png to where your project is saved. Make sure 'mycursor' is in lowercase: mycursor.png, not Mycursor.png. Select your scene in CopperCube, go to Behavior tab, add behavior using the '+' plus sign, choose 'Before first drawing do something' and select 'Action' click '...', now click '+' sign in 'Edit actions' window and select 'Special' > 'Execute Java Script'. Select 'JavaScript' click '...'. Now add the code. Click OK, then OK again. That should be it. Press play button to test if it works.
Other types of cursors[edit | edit source]
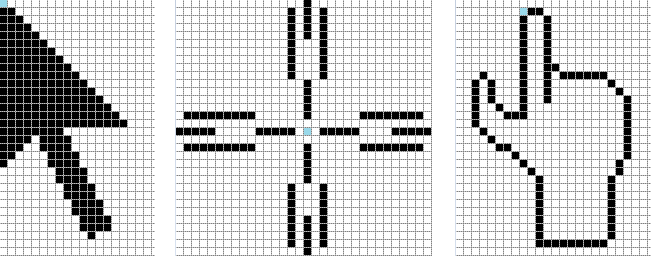
Different cursors require different active pixel locations. Make adjustments to the cursor you'll be using according to your needs. Try creating your own cursors using programs like GIMP.
| End of tutorial |
